How to Cut Felt for a UK Bar Billiards Table
5/1/2020 12:50:57 AM
How to Cut Felt for a UK Bar Billiards Table
I am a first time poster here, and I was happy to see there are already a number of posts about UK Bar Billiards.
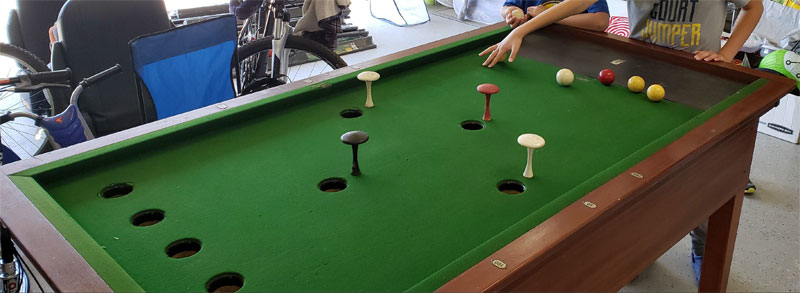
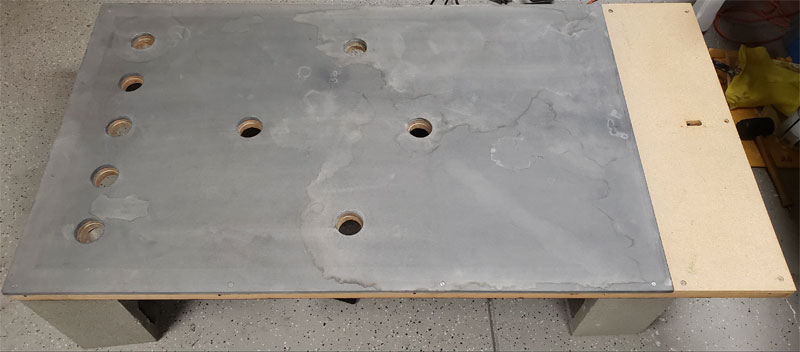
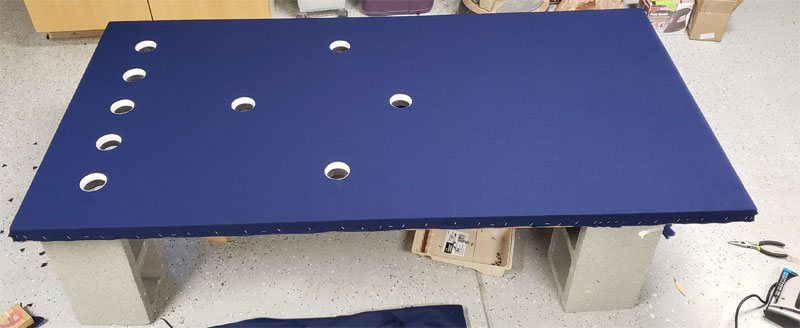
I have been restoring a Riley Bar Billiards table that I picked up in Menlo Park, California. I'm assuming it is from the 1960's. The laminate was too far gone on one side, so it's going to get a fresh look.
I have experience with replacing felt on standard US pool tables, but no experience with putting cloth on a bar billiards table with holes and pins.
Does anyone out there have suggestions as to how to proceed? Maybe you have replaced the felt on your bumper pool table before and had to deal with goal holes.
Do you cover the bed tight first and then cut the cloth to jam in the hole liners, or do you put in one hole liner at a time and work your way tight around the table as you come across the next hole?
Any insight would be appreciated.
How to Cut Felt for a UK Bar Billiards Table
Replies & Comments
 billiardsforum on 5/13/2020 3:53:03 AM
I've sent a few emails to some folks in hopes of finding a solid answer on what order you should perform the steps when installing new cloth on your bar billiard table.
Here's what I got back in response (from Mercury Leisure in the UK):
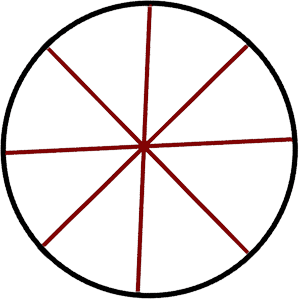
You do the edges first. Pull the cloth tight and staple it. Then you "star cut" the holes and insert the rings.
You probably already know this part, but for others who are looking to learn how the holes should be cut in the cloth for a bar billiard table, here is what I found (from a bar billiard table cloth kit):
When covering a slate, the cloth above the hole must be cut into small “V” shaped pieces (called “hole tabs”) in order to allow the ball to drop. To protect the cut tabs, a small plastic ring is pounded down into the hole so that the pressure of the ring against the cloth tabs will hold it in place.
Here is the pattern. You cut on the red lines, creating "tabs" which fold down into the hole.
Also note that it is very easy to crack the slate if you aren't careful when inserting the hole inserts.
Good luck! Hope this helps. I'd love to see the "in progress" and "after" photos if you have a chance when you are done.
Disclaimer: I am just passing this along for informational purposes. We accept no responsibility if things go sideways.
EWasser on 5/15/2020 10:32:43 AM
This is a great response. Thank you very much for taking the effort to reach out to others. No worries about the disclaimer as I'm prepared to mess up a few times (though having to spend extra money on new cloth wouldn't be the best). This table is in California, and won't have a directional nap as I believe they are intended to have. I am using a 21 oz. Champion felt as that is what I have on hand.
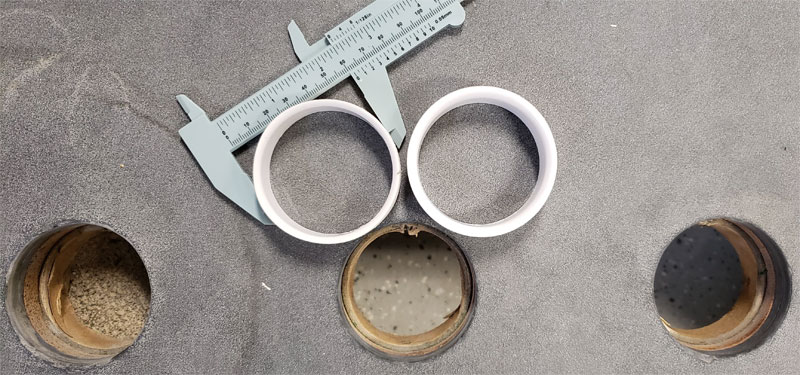
The hole liners I bought are intended for a bumper pool table, using 2 1/4" balls. I have a set of 1 7/8" Aramith balls for this table. The rings are about 63 mm stock. The holes in the slate are about 61 mm, and then taking into consideration the thickness of the cloth surrounding it, I am having to machine these down by hand.
For the star pattern, I am worried about cutting the felt tabs all the way to the slate's edge. I feel like when I pound the ring it, the cuts might be visible at the lip of the thinner remaining ring. Should the star pattern go all the way to the slate, or should the star be fully circumscribed within the hole with a little room left over like the picture below? Any insight is appreciated.
EWasser on 5/24/2020 11:36:40 PM
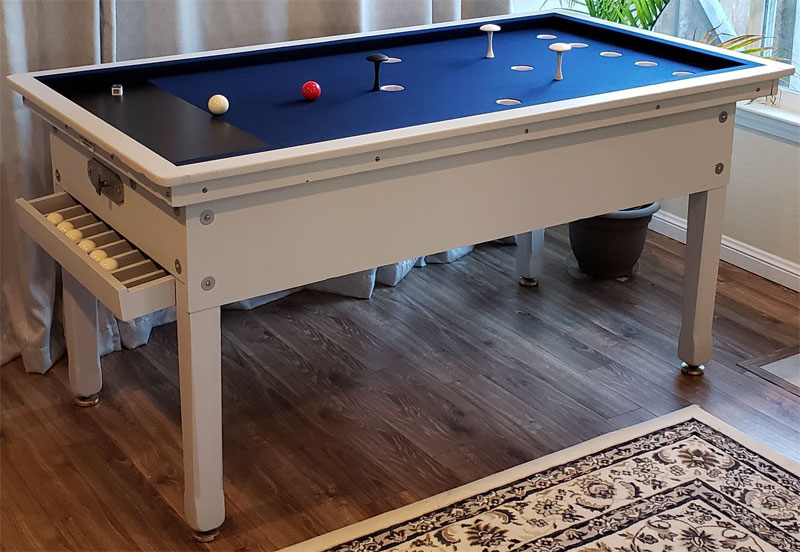
And it's done!
I spent a lot of time worrying about the hole liner installation, but in the end it turned out to be a straight forward install.
I had contemplated securing the liners with some plaster or caulking, but the friction fit seems to hold them in real solid.
I'm working on a step-by-step picture narrative of the project, because yet again, I'm looking for another project while staying at home.
 billiardsforum on 6/2/2020 6:50:50 PM
Thanks for sharing the update!
The table looks fantastic. I love the cloth color and how it looks on the pool table.
user1595177814 on 7/19/2020 9:56:55 AM
About 25 years ago I picked up an EJ Riley bar billiards table with a timer. I just pulled off the cover after all this time. I had forgotten what it even looked like.
It needs a full restoration and it looks like you've just gone through this process. I'd be interested in any tips and additional photos you may have in this regard.
It looks like you've done a great job on yours.
EWasser on 7/22/2020 8:58:50 AM
Where has your Riley table been stored/used since you picked it up? The timer on mine was in fine working order, but the table didn't have the bar inside that is actuated to stop the ball return.
My intention was to refurbish the table to a point where it was great for the family and friends to play on. It by no means would pass muster for a regulation or competition table however.
Basically it is set to "free play" where we use a separate timer to determine when balls become off limits. I am working on a pictorial step by step of how I worked on the table. If there is anything specific you would like me to comment on, let me know, and I'm happy to send to you my "guide" when that's done.
user1595177814 on 8/2/2020 3:55:30 PM
It's been stored in my basement, but as you can see from the photos, it needs a complete re-do. It will be a winter project.
I don't really have a need for any specific info - yet! But I'm sure when I get into this project, I'll need some guidance.
A step by step pictorial would be great.
EWasser on 8/3/2020 1:47:42 PM
That's fantastic that you have the original scoreboard.
Our tables look like very similar models. Your rails have notches in them for the legs to fit in, which is different than my configuration, but the inside build looks identical.
I'll message you some information. What a great project to look forward to.
How to Cut Felt for a UK Bar Billiards Table
- Title: How to Cut Felt for a UK Bar Billiards Table
- Author: EWasser
- Published: 5/1/2020 12:50:57 AM
- Last Updated: 5/13/2020 2:52:39 AM
- Last Updated By: billiardsforum (Billiards Forum)


![20200801_112853[1].jpg 20200801_112853[1].jpg](/img/u/00017288/1596408745%5f20200801%5f112853%5b1%5d%2ejpg)
![20200801_112905[1].jpg 20200801_112905[1].jpg](/img/u/00017288/1596408823%5f20200801%5f112905%5b1%5d%2ejpg)
![20200801_113032[1].jpg 20200801_113032[1].jpg](/img/u/00017288/1596408864%5f20200801%5f113032%5b1%5d%2ejpg)
![20200801_113044[1].jpg 20200801_113044[1].jpg](/img/u/00017288/1596408918%5f20200801%5f113044%5b1%5d%2ejpg)